Create a table style
This time, I will introduce how to register the design of the table as a style.When posting a table many times in the document, it is more efficient to create a "table style" and manage the table design in a style.For that reason, let's check how to use the "table style".
Word has a "table style" that can easily specify the design of the table.Many people will use this function to specify the design of the table.
When applying a style to the created table, select the "Design" tab in the table tool and select the style you like from the list.
Furthermore, it is possible to specify options such as "first column" or "striped pattern (line)".These are specified by ON/OFF in the check box on the left end of the "Design" tab.
In this way, the "table style" can easily specify the design of the table.However, some people may say, "I can't find my favorite design ...".In this case, you must use the command prepared on the "Design" tab to specify the background color (painted) of the cell and the format of the ruled line.
The problem at this time is that the operation of specifying the format is a little troublesome.In particular, when customizing the ruled line format, it is necessary to move the mouse many times, and there are many cases where it takes more time to create a design than the creation of the table itself.Therefore, it is good to remember how to make your own "table style" and use it.
Let's introduce the operation procedure when creating a "table style".First, select the reference "Table style".This time, the style of "table (lattice)" was simply applied.
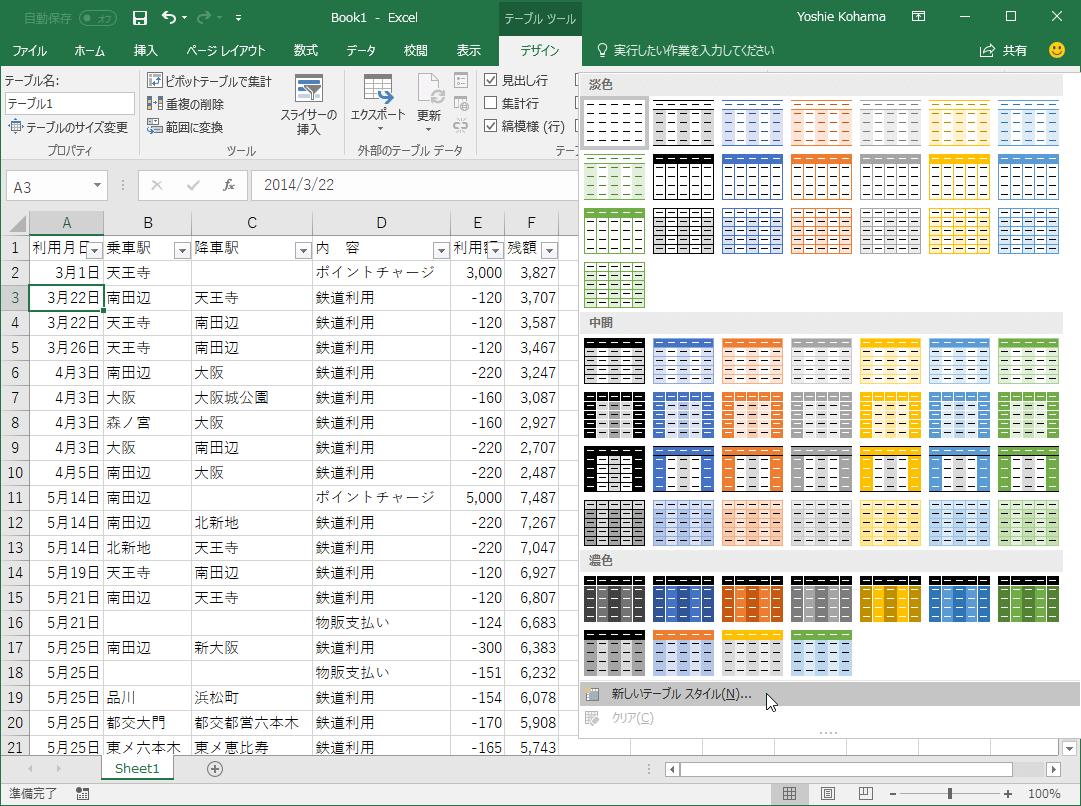
Next, open the "Table Style List" and select "New Table Style".
Then, the management screen of the format to be registered as "Table style" is displayed.First, enter the name of the style you create.
Next, specify the format of "Table as a whole".This operation may be specified using the command prepared on the management screen, such as "font" or "border format".This time, as an example, a format was specified as shown in the figure below, and a table without left and right borders was specified.
Next, specify the format of "Heading line".Change the "Format" to "Title Row" and specify the format in the same procedure.This time, as the following figure, a title line that displays the headline with white characters is specified.
In the same procedure, specify a format such as "Total" or "Striped striped pattern".These formats may be specified as needed, so you can omit them.

In addition, it is also possible to register paragraph formats in the style.These formats are specified using the "Format" button.For example, when canceling the format of "matching the grid line" introduced in the previous series, select "paragraph" from the "format" button and change the format in the paragraph dialog.
At this time, do not forget to return the "formation" to the "entire table".This is because if you specify the "paragraph format" with "Title Row" selected, only the title line is subject to the format change.When specifying a "paragraph format" for the entire table, it is necessary to select "Table as a whole" in "Application of the Format" before proceeding with the work.
Finally, specify the "Table Properties".This is also the basics to proceed with the work with the "Table Overall" selected.
The "Cell" tab of the "Table Properties" has a format for the placement of characters in the cell.Since the initial setting is specified, "upper alignment" is specified, so it is better to change it to "central alignment".
The "Table" tab has a format that specifies the entire table placement method.It is common here to specify "left alignment" or "central alignment".If you click the "Option" button on this screen, a screen that can specify the margin in the cell will be displayed.If you have canceled the format of "Matching the grid line", adjust the margin here.
The above is a rough flow when creating a table style.All you have to do is click the "OK" button to close the screen.
Once you have created a "table style", let's apply it to the table.This procedure is the same as applying the style prepared from the beginning.You can move the cursor to the front and select "Self -made style" from the list of styles.
Now you can specify the entire table format with one click.When posting the table many times in the document, instead of specifying the format, using the "Table Style" to specify the format will greatly increase the work efficiency.
Of course, it is possible to change the format registered in the "table style" later.In this case, right -click your own style and select "Change Table Style".
Then, a format management screen is displayed, and the style format can be re -specified.
When creating a table design, you may be worried about the line break (paragraph symbol) in the table.The Word table has a line break mark in each cell.As a result, the inside is full of line breaks, making it difficult to check the design in the table.
So, let's introduce how to hide the line break mark.To do so, it is necessary to change the Word option.Select the "File" tab and click "Options".When the option screen is displayed, select the "Display" item and turn off the "paragraph symbol" to hide the line feed mark.
In this case, the line break mark will be hidden even in a normal paragraph, but if you turn on "Display/Hide Edit Symbol", the line breaks can be displayed again, so it should not be a major problem.is.
It is a good idea to remember it as a trivia when creating a table design.Of course, after creating the design of the table, you may need to open the Word optional screen and check the "paragraph symbol" to ON.
 notebook-laptop


